


How to Create an Infinite Bandwidth Machine with Amazon S3
We have entered a new era of the internet. An era of infinite bandwidth! Now you can take advantage of Amazon's vast network of servers to allow your website to survive even the most extreme spikes in bandwidth. Here's a tutorial on how to to access S3 like an FTP server to host your bandwidth sucking media files (pictures, videos, mp3's, zips or any other type of file).
 And in this article, I'll show you how you can integrate your existing website on any typical hosting platform to "tap in" to this infinite bandwidth supply and leverage the power of the Amazon S3 infrastructure.
Some bandwidth hogging articles have recently been posted to Nerd Business. A few readers have asked me, "are you crazy?" Indeed, hosting hundreds of wallpapers & thousands of icons for nerds across the globe may seem like bandwidth suicide.
And it certainly would be. If you were a dumbass. Hosting from any typical webhost means there are limitations on bandwidth. You can't just host a thousand images on one page and expect to be lollygaggin' as it hits the Digg front page.
With your "starter package hosting" one of two scenarios will happen:
A. Your site will go down after exceeding the bandwidth limit
B. Your Visa will max out from over-usage bandwidth fees
If you're lucky, after hitting the bandwidth cap your site will simply be deactivated. If however, you're on a hosting plan that charges per GB of over-usage then the results can be disastrous (to your credit card balance).
Even from a good host like MediaTemple they charge $2.56 per GB over quota. So let's say you were sleeping when your site suddenly landed on Digg front page and used a modest 100 GB over your quota by the time you awaken. It would have cost you $256 ! Making it by far the most expensive day of webhosting you ever had.
Yet hosting thousands of images one one page and surviving the Digg effect without going bankrupt is possible with Amazon S3. In contrast to our Media Temple example, who charge $2.56 per GB over quota, Amazon S3 currently has a a flat rate of $0.18 per GB. Meaning that the 100 GB of bandwidth used up while you were asleep would have only cost $18.
Amazon S3: the fuel for your machine
The beauty of Amazon S3 is that you can keep your crappy shared hosting package and simply "tap in" to leverage the S3 infrastructure when you need it.
One of the most effective, and easiest ways for a high traffic media website to utilize S3 is for hosting images. You can setup S3 to host every image on your website (I'll show you how in a moment). This gives you the advantage having S3 as a separate service to handle the bandwidth spikes while you stay under the bandwidth cap on your existing hosting platform.
Goobleygook, API, & Developer Stuff
The problem for many of us however, is that Amazon S3 is geared for developers. If you expect to jump into S3 and start using it like an FTP to upload & share everything on your hard drive with the ubernet then you'll soon hit a brick wall technical gargon. That is, unless you're reading this guide.
With the following tutorial I get straight to the point about how to use S3 as an FTP. Read on to learn how to setup & configure your S3 account for "FTP like" easy file management.
How to Setup Amazon S3 for your Website
 First get your Amazon Web Services account. You can do so at: http://aws.amazon.com
Look under "Infrastructure Services" in the left hand navigation menu and choose Amazon Simple Storage Service (or Amazon S3 for short).
Create an Amazon account if you haven't already got one. You can use the same account as you do for buying stuff on Amazon.
Once you have your Amazon account setup & ready, you'll get your AWS Access Identifies. These keys are needed each time you connect to the S3 service.
Connecting to S3 with S3 Fox
Our tool for connecting to S3 like an FTP will be a handy little Firefox plugin called S3Fox.
Download S3Fox and install the plugin to your Firefox browser.
Once you have it installed, it will open in a mini window in the bottom corner of your browser. Click the Manage Accounts button and enter your AWS Access Identifiers.
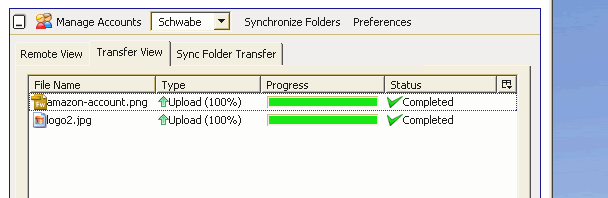
Voila! You are now connected to the infinite bandwidth machine. To upload files, first create a "bucket" which is essentially the term for a folder on S3. Then just use your system's file browser to drag files into the S3Fox. Remote View window within S3Fox.
Downloading Files from S3
For the purpose of this tutorial, upload a picture. Once you have it uploaded, goto the Remote View tab, right click it and choose "Copy URL to clipboard". This is an easy way to get the URL of any file you upload to your S3 account.
The URL will be something like, http://myfolder.s3.amazonaws.com/mypicture.jpg
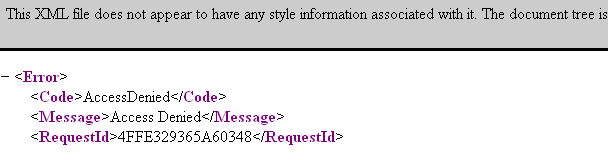
You'll notice however, you get an XML error saying "Access Denied". Every file on your S3 server has an authentication variable that you'll need to set to "Public" if you want to be able access it via the browser.
To do this, back in S3Fox, right click your file and choose "Edit ACL".
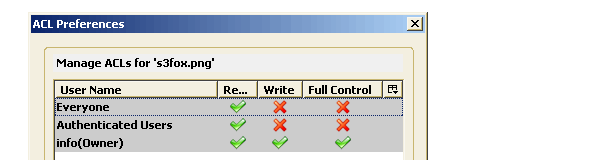
Ensure that Read access is checkmarked for everyone. Click Save then access the same URL and this time your picture will display. If you're working with a large number of files, repeat this process to set the ACL for an entire folder.
The best way to link to images from your website
You have images on S3! Yet before you go S3 crazy and start uploading all your website images I recommend you take an additional step to achieve the most ideal linking setup.
Having all of the images in your website link to an external site is not SEO friendly and can also set off some security alerts for your end users (Popup blockers, Anti-virus, etc). It's best practice to always link to images within your own domain. Yet how do we do this if S3 files have a different URL?
The solution is to create a CNAME record in your DNS so you can link to images in your S3 account like this: http://images.yoursite.com
Firstly, create a new bucket/folder in the root of your S3 account called s3.amazonaws.com.
This is the folder you will upload all of your bandwidth sucking images to.
Then create a CNAME entry for your domain called images with the address images.yourdomain.com
The process of creating a CNAME will depend on your webhosting provider, so refer to your webhost's support documentation for reference if you need help.

With the CNAME created and the corresponding bucket in your S3 account you should now be able to access images within that folder via images.yoursite.com/imagename.png
You can test this out by uploading an image to your newly created S3 bucket/folder and using S3Fox to copy the URL again. S3Fox will generate a URL something like this: http://images.yoursite.com.s3.amazonaws.com/test.jpg
With the CNAME entry we created, you can also access the image by removing the "s3.amazonaws.com" so tai looks like this:
http://images.nerdbusiness.com/test.jpg
And now you're in business.
Sizzle: Another Effective S3 Tool
S3Fox is great yet I have found it to be tedious when working with the ACL for hundreds of images. For a more in depth solution to managing your S3 server, check out Sizzle. It's a desktop app written in C#. It works even more similar to an FTP but the biggest advantage to me is the queue window that shows the progress as it processes the hundreds of ACL settings at one time.

