


What if Someone Steals your Laptop? A Tutorial on Mobile Data Encryption
You're sitting in an airport lobby, having an orange juice and cranberry muffin, talking on your PDA - when suddenly you realize your laptop bag is no longer at your feet where you had placed it. It's gone. It has been stolen.
Worse yet, on this laptop is your company's accounting, client contact information, saved FTP connections, and very personal notes. And now some delinquent thug has all of it. F@#k!
This could have been easily prevented. Here's how.
Make Your System Impossible to Crack with Encryption
Using software it's possible to "lock" your laptop with such a high level of data encryption that it would be impossible for any thief to get access. And even if this theif was determined enough to attempt to unlock your information, bypassing the 256 bit code I am about to show you how to create would take this guy a thousand years.
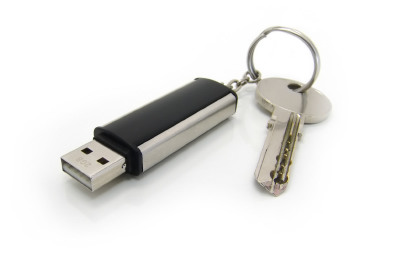
For you however, accessing the information will be easy. The strategy is simple: the data is encrypted or "locked away" and the only way to unlock it is to enter the 256 bit code. This code actually resides on a separate USB drive. You keep this not in your laptop bag, but in a different location such as an inside coat pocket or key chain. So when you boot up the laptop, you insert the USB drive, copy the code, and gain access to the decrypted data.
The advantage of using this method, is that if your laptop is ever stolen or lost - there is no way anyone can access your data without actually having that USB key containing the 256 bit code. Secondly, this is fast and easy because for you the process of "unlocking" the data will only take about 30 seconds each time you boot up the system.
Step By Step Tutorial
There will be 2 specific software tools we use to achieve this level of data security. First, we'll use a program called KeePass which essentially stores the 256 bit key on our USB drive. Then on the laptop we'll install a powerful encryption tool called TrueCrypt to not only encrypt the data.
Yet first you'll need to generate an absolutely random 256 bit key. You can get one in about 2 seconds by visiting this site.
Once you have your key, it's time to store this within KeePass. This program will hold the entire key and allow us to get access via a more simpler password that only you know in your head.
 Forgetting your KeePass password can lock you out of your data FOREVER. Make sure you remember this password!
Download the portable version of KeePass here. We will save the program to the laptop, but the actual database it creates we will store on the USB drive.
From your laptop, click KeyPass.exe and press "File>New". It will now ask for a "Master Password". This is the password that you'll remember in your head so it doesn't need to be complicated.
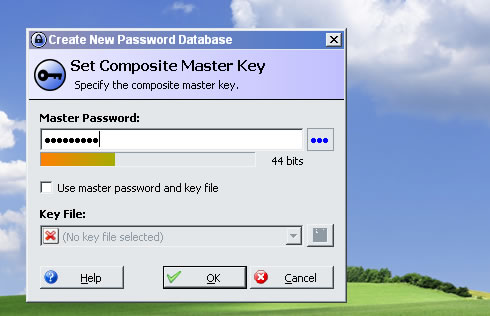
Above: Set a basic password for KeePass that you'll remember.
After verifying the password again, right click the big white area now and press "Add Entry". Here there are a lot of options, but you'll only require two fields. Enter a general name such as "laptop key" and now paste the 256 bit key you generated previously. Press Okay.
Then using "File>Save As" save this KeePass database to your USB drive. At this point you can close KeePass until we need it again.
How to setup & use TrueCrypt
TrueCrypt is the second and final software tool we'll need to use to complete our highly secure data setup. It's an on-the-fly encryption solution which means the data on your laptop will be automatically encrypted or decrypted right before you load or save. And even when your using the files, TrueCrypt never saves any decrypted data to the disk - to only stores it temporarily on the RAM.
TrueCrypt actually will allow you to encrypt an entire hard drive partition. This would technically provide the highest level of possible security since you wouldn't even be able to access Windows without authentication - however I recommend starting with a more quick & simple solution that I will outline below.
Rather than encrypting the entire hard drive, which can take a long time and will reduce laptop performance, we will instead create a "container" file to hold all of the important data we want to protect.
Setting up the TrueCrypt file container
Step 1: Download & install TrueCrypt. Once it opens, you'll see a list of available drive letters. Once our container is created, you will actually mount it as a drive on your system making it easy to save and load data just as you normally would - the difference being all the data is encrypted.
Step 2: Press the "Create Volume" button.
Step3: On the Wizard popup choose "Create a file container" and press the Next button.
Step4: On the following screen, choose Standard.
Step5: For "Volume Location" specify where you want to save the container, something such as "C:/Business/container". Press Save and proceed to the next step.
Step6: For Encryption options, choose AES and press Next to choose your Volume Size.
Step7: Volume Size - if you have a lot of data to encrypt, make sure you create a container big enough to hold it all.
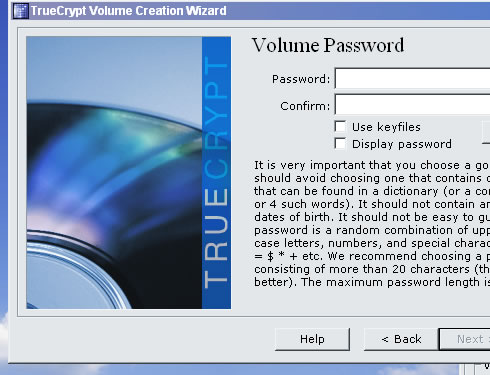
Step 8: Password - this is where you'll enter the 256 bit key stored in KeePass.
To get the password, start KeePass and load the database stored on your USB key. The 256 bit key can be copied by right-clicking your laptop password entry and choosing "Copy Password to Clipboard".
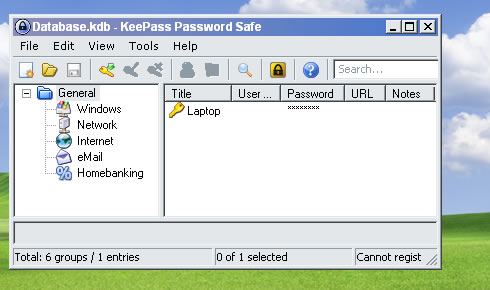
Above: The 256 bit key is stored within KeePass' database. Right click "Laptop" and copy the password to the clipboard.
Back in the TrueCrypt Wizard, paste your password into the boxes and choose Next.
Step 9: Move your mouse randomly to increase the "cryptographic strength" of your encryption key and finally press the "Format" button to create the container file.
Mounting the container file
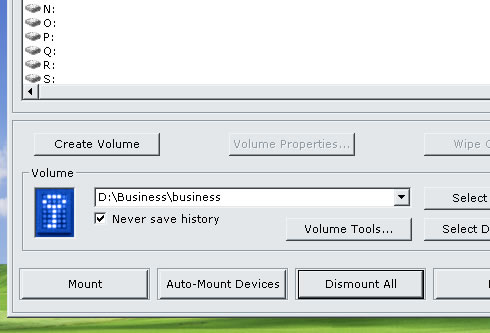
Now that you have the container file created, you will mount the file to an open drive letter on your system so you can begin saving files to it.
Highlight any drive letter and press "the Select File" box to choose your container file. Then press the big "Mount" button.
After clicking mount, you'll be required to enter the password you have saved within KeePass. After pasting the password and pressing OK, TrueCrypt will mount your container to the volume.
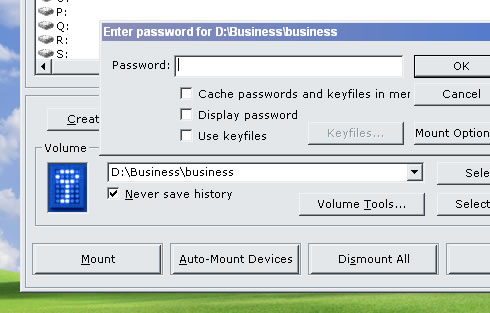
Above: Paste your 256 bit key from the KeePass database to mount your container file
Done! You've just successfully mounted the container and it's ready for use. Since the container is now a mounted drive you are safe to use it just like a real hard disk - installing programs, saving and moving files.
As indicated, the difference now is that anything on this drive is encrypted.
Another key difference is the fact that every time your system starts up - you'll have to copy your password from the KeePass database and repeat the mounting process to use the files again.
And that is the core of this data protection strategy. Until decrypted, your TrueCrypt volume will appear to consist of nothing more than random data. If a thief steals your laptop and starts up your machine, he would need to have your 256 bit password to actually mount the container and use the files. And there is no way to get that password if the only place it actually exists is in your pocket.
 One Final Tip:
In case you lose your USB key, be sure to backup your KeePass database on another drive, such as your home desktop computer.