


Puppeteering Nightmares
And perhaps can also serve as an introduction to Pupeteer if you have not done any browser simulation testing yet; in which case you may simply ignore the Nightmare stuff below & instead direct your attention to the forthcoming Pupeteer code exclusively:
  //### Initialization  ###

  //old tek:
  const Nightmare = require('nightmare')
  const nightmare = Nightmare({ show: true })

  nightmare.goto('http://localhost:8000/my-test')
           .wait(1000)

  //now becomes:
  const puppeteer = require('puppeteer')

  const browser = await puppeteer.launch( {headless: false, defaultViewport: null } )
  const page = await browser.newPage()
  await page.goto(`http://localhost:8000/my-test`, {waitUntil: 'networkidle2'})
  //> keep doing more actions or standard JS logic; no chaining needed.
  //  no nesting necessary
headless : false is the equivalent to show : true in nightmare which will open the browser and simulate it before you so you can watch the test happen. This is the mode you will want to start with as you create your test so that you may get a sort-of feedback loop going as you build it; so you can see the results and debug the 'puppet' browser using Dev Tools in the same process/window. Then when you're test is finally doing what it should (and passing) - you can set this to 'headless' so that you can later run your tests faster or in an automated pipeline behind the scenes).
About that actual 'test'
Tangentially related but prudent since this is all about testing... to "pass" (or fail) your tests I recommend substack/tape
In other words, you'll need a separate technique or library (ie- tape, as suggested) to perform the actual assertions about what your code output should or should not be. Because that aspect is not handled - nor in the scope - of a tool like Puppeteer (or if it is I didn't care to check, but in either case I still recommend tape).
There is yet another JavaScript holy war with regards to testing so I can't speak for everyone but personally I don't want complex or fancy testing procedures which would otherwise detract and distract from already something that is pulling me away from the core of my application (game, library) development. Just need a test to assert if something should be true or false or some specific value under a given 'simulated' scenario - extra points if the resulting summary can show me a nice little green checkmark ✓ or red x. substack's tape fits the bill and it works in combination with a well established programming language agnostic test output / console formatting standard called tap which formats the text of your 'test result' to your terminal window that will end up looking something like this:
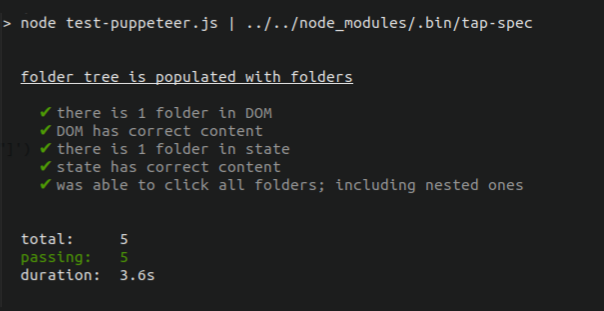
So if you're running Pupeteer in headless mode for example, it would do its simulation in the backgrond and then this output is all you would see (aside from optional console.log output if you have any in your app code). If you ran non-headless then you would still get this terminal output with an added browser window that spawns open to do the simulation before you.
waitUntil: 'networkidle2' is just to ensure the page has finished loading before your simulation starts operating on the page; in Nightmare they didn't have a formal way to do this but instead had a method to wait for a given element to appear in the DOM as an indirect way; I was typically lazy and just used .wait() for a second or two which was generally sufficient; extra points again for Puppeteer here.
And final note in context of initialization, I find defaultViewport: null is needed in Puppeteer to avoid a weird issue with page scroll.
Clicking and Typing
With initialization out of the way, let's assume you want to type keystrokes and click something.
//old tek:
nightmare.type('textarea', 'hello world')
         .click('button')

//in Puppeteer, now becomes:
await page.type('textarea', 'hello world', {delay: 100})
await page.click('button')
In the above example we start our 'puppet' by typing in 'hello world' to a vanilla textarea field. And then click on a standard <button> element. Not much difference as you can see between the APIs. The delay : 100 represents how fast the puppet will type.
Parsing the DOM and global state
Typing and clicking around has no point unless you can evaluate the resulting effects on your DOM and global (window) state. This is where async/await shines.
  //old tek:
  nightmare.end()
    .evaluate(() => {
      return {
        notes: window.myState.notes,
        dom : document.body.innerHTML
      }
    })
    .then( results => {
      //results.notes is a JS object
      //results.dom is a string of the entire page
    })

  //now becomes:
  let myStateNotes = await page.evaluate(() => myState.notes )
  let body = await page.evaluate(() => document.body.innerHTML )
From a long looking promise chain to just 2 lines; it is definitely far easier to reason about the latter.
In this example, myStateNotes refers to the global window object "myState" which has a property called 'notes' here in our demo application.
I recommend exposing global variables like this so you can use them to easily expose for your tests (and if on production you want to turn those off you can configure your build to do that).
Note that in this example I am pulling the entire DOM as a single object. You could of course just pull down specific elements using more precise selectors. That said, I generally prefer to query the DOM with jQuery sizzle - something not afforded in Puppeteer out of the box which will have you relying on rather less intuitive Xpath selectors instead - so here an example of how to effectively 're-mount' your dom serverside so you may query it with jQuery (or iterate, parse, and hackup using almost the entire jQuery API thanks to Cheerio) and in the context of test assertions via tape:
  let $ = cheerio.load(body)
  //test we have 4 dom nodes with .note class :
  t.equals (   $('.note').length , 4 )
  //test our custom element list-menu has a class called bg-blue :
  t.ok ( $('list-menu').hasClass('bg-blue') )
Convert any HTML page to PDF
const puppeteer = require('puppeteer')

(async function() {
  const browser = await puppeteer.launch( {headless: true, defaultViewport: null } )
  const page = await browser.newPage()

  await page.goto(`http://localhost:8021/search-terms.html`, {waitUntil: 'networkidle2'})
  await page.pdf({ format: 'A4', path : './exp_pdf/search-terms.pdf' })

  await page.goto(`http://localhost:8021/search-keyword.html`, {waitUntil: 'networkidle2'})
  await page.pdf({ format: 'A4', path : './exp_pdf/search-keyword.pdf' })

  await page.goto(`http://localhost:8021/user-location.html`, {waitUntil: 'networkidle2'})
  await page.pdf({ format: 'A4', path : './exp_pdf/user-location.pdf' })

  await browser.close()
}())
In the above example I am opening 3 dynamically generated HTML pages and creating a one-page PDF from each of them - that I will later combine into a single PDF to share as a report for a client (lifted from one of my real-world codebases that also involves some spreadsheet parsing to get it into said HTML, later as PDF - to summarize Google Adwords performance in a tidy, automated way).
Quite a powerful technique particularly if you are adept at making HTML/CSS layouts - you can pretty much turn any of your creations into a PDF; for reports like this or for more page-intensive/automating tasks like composing an eBook for example.
The example also shows how to use async/await at 'as close to top level' as possible in Node script (a limitation of NodeJS at time of this writing; though you can use top level async/await in modules).
Conclusion
Puppeteer is a powerful API that is much easier to use than earlier incarnations of automated browser bots - thanks to async/await control flow - and thus is prudent to use if you have a web app(s) in production that need to work reliably - and need to keep working reliably - as your projects continue to develop.
If you're building a site that has any extent of client-facing functionality engineered into it such as an adminstration dashboard with some uploading capability or publishing/CMS-like features built in. In that case, you should write a custom Puppeteer test for it to stress-test & simulate a complete end to end user-experience to test those specific features - and run the test routinely as you commit to the codebase overtime.
That way months later after making new changes - before you finalize commits & push to production you can run the Puppet test to make sure all those CMS features you worked hard on months prior keep working - and if they don't you can quickly address the problem or adapt the test so it keeps up to the extent of new features you extend it with or combination of use-cases your users may throw at it.